This feature is available in UEStudio only.
Git is a very popular distributed version control system. UEStudio offers robust Git integration so that you can directly interact with Git repositories from within the application. You can learn more about Git and read over its full documentation at the official Git website.
In order to use Git with UEStudio, you need to have a Git client installed. Git for Windows is recommended.
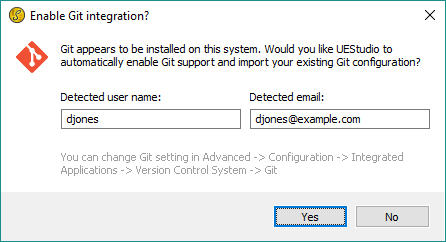
If you already have Git for Windows installed on your system, then on first run UEStudio will detect this and prompt you to import your Git credentials. Otherwise, you can configure Git in UEStudio's settings.

Using Git
 Once Git is properly configured on your system, you can then begin interacting with repositories and objects through two different methods:
- Browse to a Git repo folder in the "Explorer" tab of the Workspace Manager.
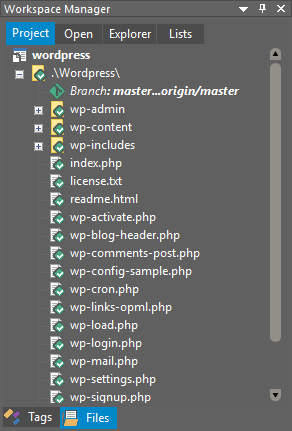
- Add a Git repo folder to your project and view it in the "Project" tab of the Workspace Manager.
In both cases (if Git integration is configured in UEStudio properly) UEStudio will display the repo folder with a special Git icon overlay. If in a project, UEStudio will display the current branch and commits ahead/behind directly beneath the folder name.
Additionally, a special "Git" sub-menu is available in the context menu for files/folders under Git in the "Explorer" and "Project" tabs. This sub-menu contains many commands for interacting with the Git repository.
Creating and cloning repositories
- To create a new Git repository, right-click on the folder where you want to initialize the repository, and select Git » Create/initialize repository here. The hidden ".git" subfolder will be created, and you can begin adding, staging, and committing files.
- To clone an existing Git repository, right-click on the folder where you want to clone the repository and select Git » Clone repository... This will open the "Clone repository" dialog where you can enter the full path or the URL (SSH or HTTP[S]) to the repository. This dialog also contains the following options:
- Branch
This option allows you to specify which branch to switch to when cloning a repository. If left empty, or if a branch is provided that doesn't exist, this will default to the HEAD branch.
- Depth
This option allows you to create a shallow clone where the repository history is truncted to the specified number of revisions. For example, if you enter "2" here, the history for only the last 2 revisions will be available in your locally checked out repository.
- No checkout
This option will clone the repository without checking out a branch, essentially creating a disconnected Git branch.
- Recursive
This option will clone the repository along with any submodules contained within it.
Interacting with repositories
Managing branches
Using the integrated Git shell
Configuring Git
 Once Git is properly configured on your system, you can then begin interacting with repositories and objects through two different methods: